Release Notes 2026
Frequently Asked Questions!
How do I access field level help?
How do I see descriptions of codes in enquiry screens?
How do I make a user have read only access
Can I copy and delete lines in data entry screens?
Out of Office
Can I run a report to view security groups against my users?
How do I stop a user posting to prior and future periods?
Delete a payment run
Changing security access to a user
User setup requires multiple screens and is complicated!
De-allocate an AP Payment
How to stop over receipting of orders
Why has my transaction not appeared on the AP Payment run?
Download Templates
Useful information to include when raising Financials cases
Prevent users posting to specific balance classes
Hints and Tips!
General Ledger - Helpful how-to guides
General Ledger Data Entry
Journal Upload
Journal Entry, Copy and Authorise
Multi Level Authorisation
Modernisation Budget Upload
General Ledger Enquiries
GL Enquiries - Transaction Enquiries
GL Enquiries - Balance Sheet & Profit and Loss
GL Enquiries - Account Details
Trial Balance
Period and Year End Close
General Ledger Security
Accounts Payable - Helpful how-to guides
Accounts Payable Supplier File
Accounts Payable Data Entry
Log and Invoice/Credit note
Enter a logged Invoice
Enter a non order related Invoice
Order Related Invoice
Order Related Invoices with Mismatches
Order Related Invoice - Mismatch Scenarios
Mismatch Types
Invoice and Credit Note Matching
Accounts Payable Enquiries
Accounts Payable Transaction Maintenance
Accounts Payable Payment Processing
Accounts Payable Code Tables
Accounts Payable Reports
Accounts Receivable - Helpful how-to guides
Customer Maintenance
Enquiries
Cash Allocation
Data Entry & Contracts
Student Sponsor - Education sector
Credit Control
Credit Control Overview
Customer Statements
Diary Notes
Query Management
Interest Charges
Dunning Process
Credit Control Diary
Reporting within Financials
Student Sponsor - Education Sector
Purchasing Management - Helpful how-to guides
Fixed Assets - Helpful how-to guides
Prompt File - Asset Creation
Join Prompt File Items
Fixed Assets Period End & Depreciation
Revaluation
Disposals
Relife
Reconciliation process - Helpful how-to guides
Accounts Receivable Reconciliation Reporting
Accounts Payable Reconciliation Reporting
Daily Checks
Fixed Assets Reconciliation Reporting
General Ledger Reconciliation Reporting
Purchasing Management Reconciliation Reporting
Reporting
General Ledger Reports
Accounts Payable Reports
Accounts Receivable Reports
Sales Invoicing Reports
Fixed Assets Reports
Bank Reconciliation Reports
Import Tool Kit
Procurement Portal
Procurement Portal new User Interface
Navigation
Requisitions
Orders
Authorisation
Receiver
Invoice Clearance
Portal Administration
Procurement Portal - Teams Setup
Invoice Manager
Purchase Invoice Automation (PIA)
March Release Update
February Release notes
January 2026 Release notes
Deleting Supplier training data
Password Reset in Smart-Capture
Adding a New User - Smart Workflow
Resetting password - Smart Workflow
Purchase Invoice Automation
Reprocessing Failed OCR Supplier Invoices
How to Create a New User in Smart-Capture
Smart Capture Email Configuration Overview
Configuring Smart Capture to use Gmail in the Web UI
Configuring Smart Capture to use Microsoft 365 (Graph API) in the Web UI
MAP Configuration Non-Microsoft and Non-Google Accounts
New User Interface
BPM
Request a nominal
Request a customer
Request a Sales Invoice
Request a management code
Create a Pay Request
Request a Supplier
Bring Your Own BI (BYOBI)
Collaborative Planning
Financial Reporting Consolidation
Air Approvals
Registering Air Approvals
Air Approvals Administration – Create Mobile User
Air Approvals Administration – Reset User’s Activation Key
Reviewing Approvals
Disable/Enable a User
Delete a User
API
Release Notes 2025
December 2025
November 2025
October 2025
September 2025
August 2025
July 2025
June 2025
May 2025
April 2025
March 2025
February 2025
January 2025
Release Notes 2024
December 2024
November 2024
October 2024
September 2024
August 2024
July 2024
June 2024 Release
May 2024
April 2024
March 2024
February 2024
January 2024
Release Notes - Previous years
Contents
- All categories
- Accounts Receivable - Helpful how-to guides
- Credit Control
- Customer Statements
Customer Statements
 Updated
by Caroline Buckland
Updated
by Caroline Buckland
The process
You can generate a monthly statement for each of your customer's account to show outstanding balances.
There are company controls that would have been setup by your consultant during implementation that determined some of the settings below.
- Statement Level - Customer or Transaction level
- Include Zero Balance Transactions
- by Location, to determine whether a customer receives a single statement or per internal structure location
You can generate at any time of the month for individual customers, a range of customers or all customers by defining the ledger, BTZ element, department or area.
The statement can automatically be emailed to the customer upon completion of the process if an email account is held on the customer file.
Access the following menus:
Accounts Receivable > AR Processes > Credit Controls > Statement Print All Customers
Statement Print All Customers
This process will create a Customer Statement for all Customers based on which options are selected in this process.
Below is a basic example of the settings you can use in this process. If you are unsure of any of the fields, remember you can click on the field and use the F1 (field help).
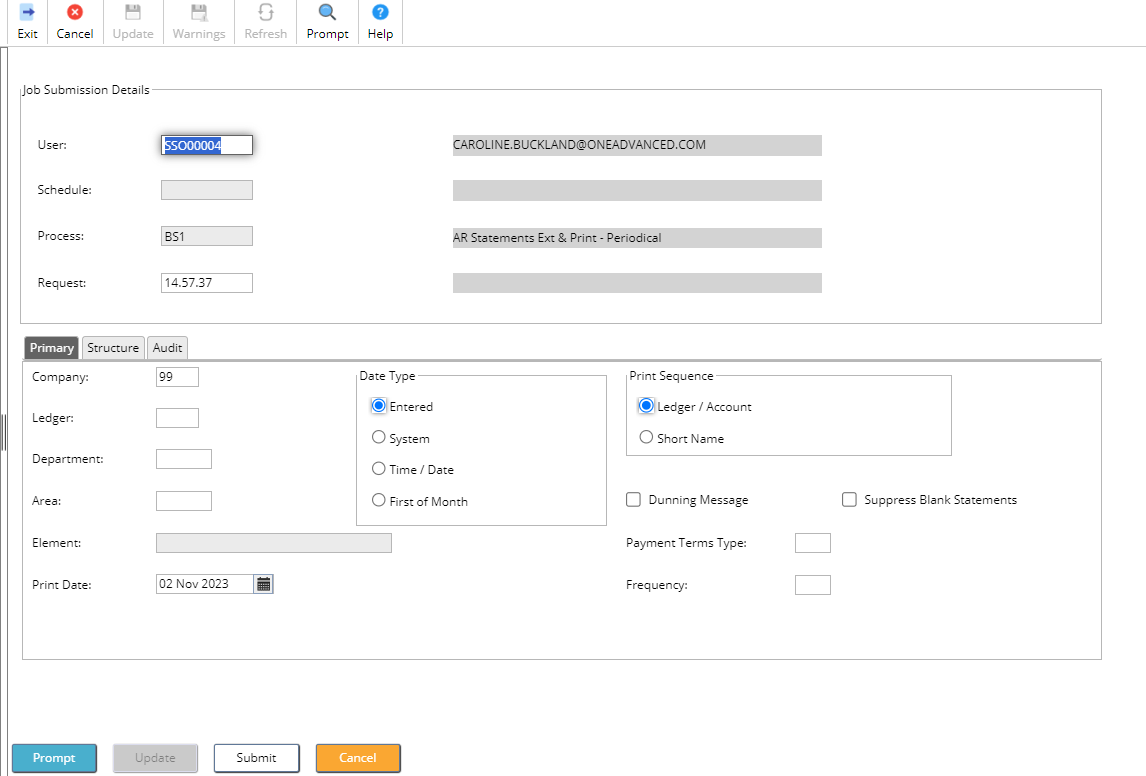
Once complete click on SUBMIT followed by SUBMIT again.
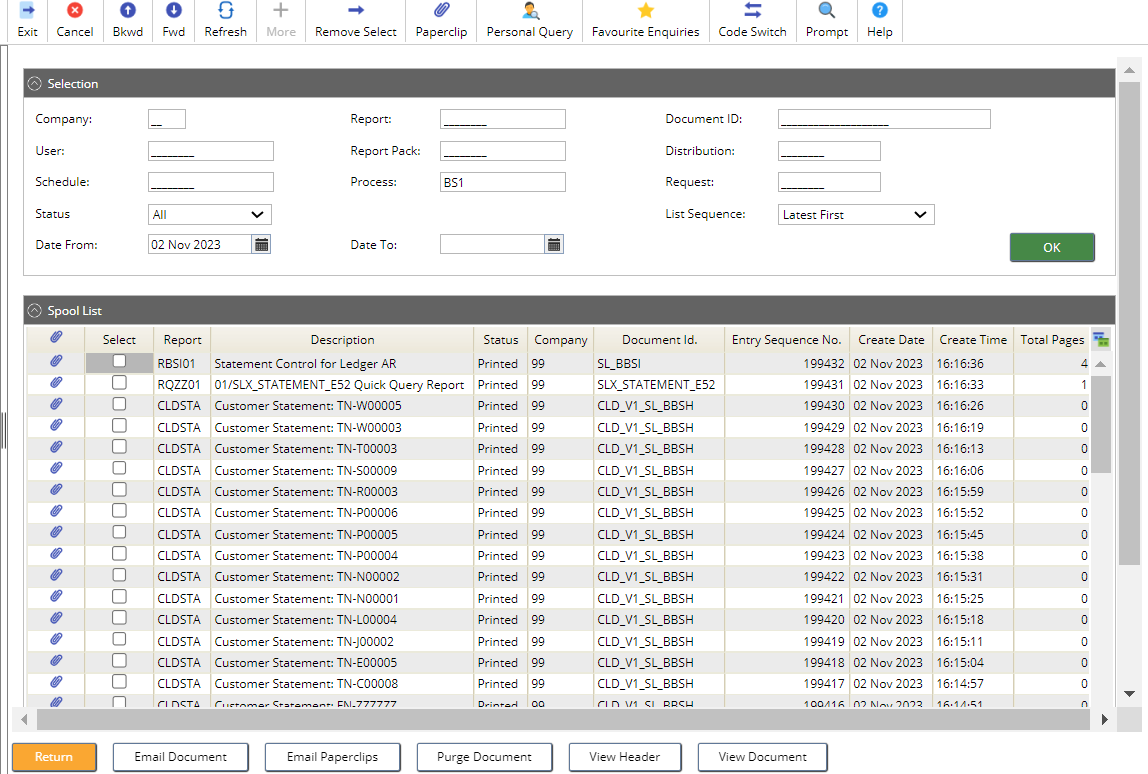
To view the output access the spool.
Menu access:
Systems Admin>Spool
You can enter BS1 in the Process and then click OK. The statements can be viewed here by clicking on the paperclip attachment.
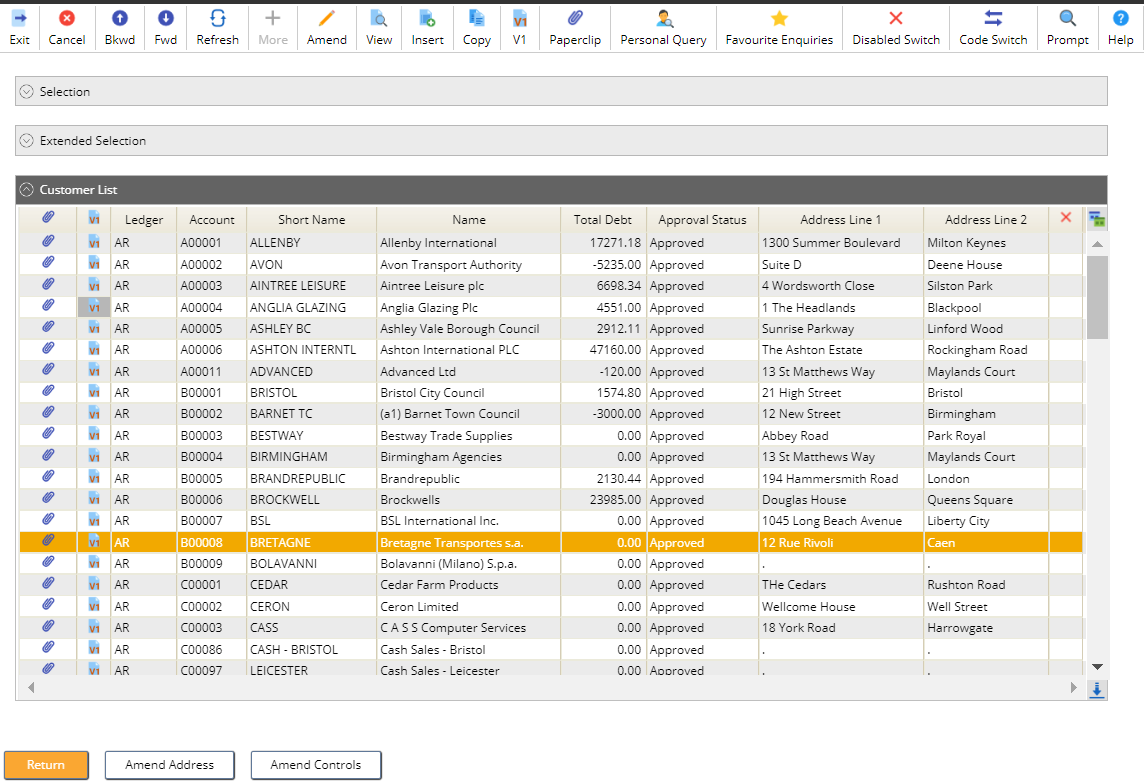
The Customer Statement will attach on the Customer Record in Maintain Customers.
Menu access:
Accounts Receivable>AR Processes>Customers>Maintain Customers, click on OK to retrieve a full list.
Clicking on the V1 or Paperclip icon against the customer will display the statement.
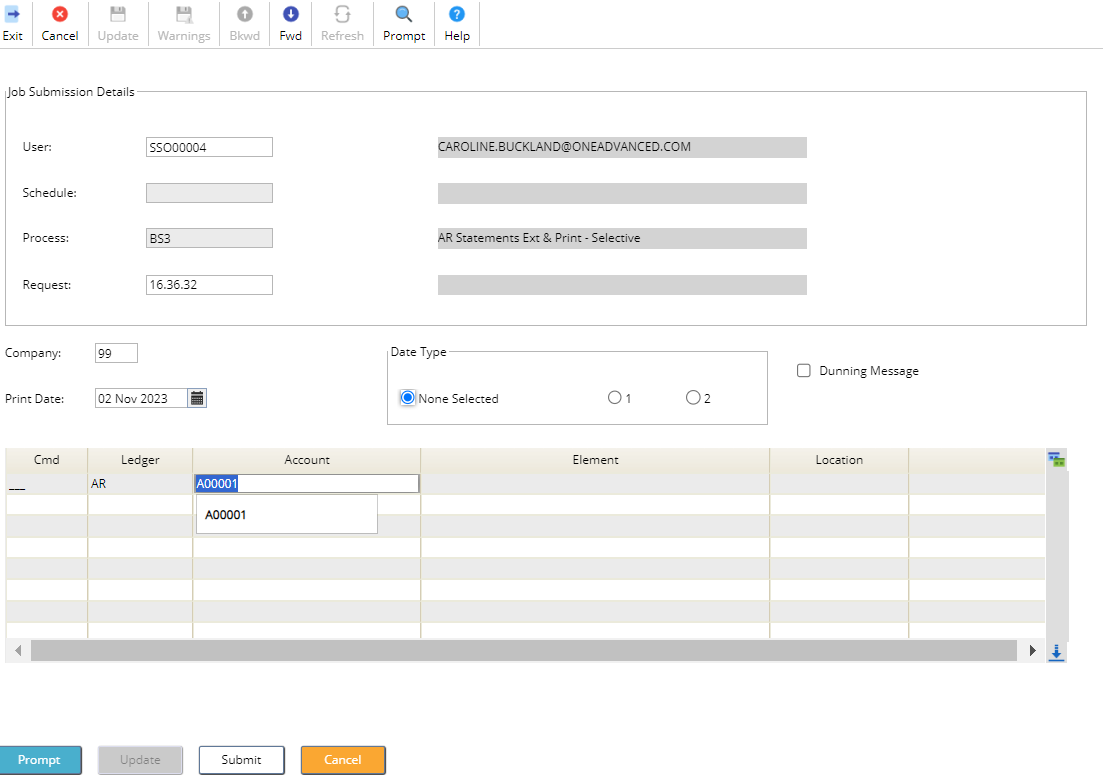
Statement Print Selective Customers
This is very similar to the previous Customer Statement process but this process allows you to define which customer(s) will have the Customer Statement created.
Access the following menus:
Accounts Receivable > AR Processes > Credit Controls > Statement Print Selective Customers
Once the parameters are set, click on SUBMIT followed by SUMBIT again.
Follow the steps above to locate the statements on the customer account.